Rustic Fireplace Mantle: Live Edge Curly Maple
Selecting the Live Edge Mantle
 Having recently purchased a rustic and historic farm house, Cheryl was adding her own decorating touches to her new home. One of the major projects on her list was to re-do the existing fireplace, changing it from a simple brick structure to a stone fireplace that would complement the natural wood and exposed beams that surround it.
Cheryl knew she wanted a rustic mantle, and had live-edge in mind, but really didn’t know what she wanted when she walked into Goosebay Lumber in Chichester, New Hampshire. As an artist, she trusted her instincts to guide her to just the right piece. As she wandered from slab to slab, looking at each, a 4 inch thick slab of curly maple kept catching her eye. She loved the way the light caught the ripples along the edge of the piece. As she reached out to run her hand along the wood, she got an electric shock and the hair stood on the back of her neck. Fanciful? Maybe. But Cheryl knew she had found just the right live edge slab to use for the mantle on her new fireplace. As she says, “How does a piece of wood give you a shock?!”
Masonry Considerations for Installation
 Not having carpentry skills, Cheryl hired Ted of T. West Woodworking to prepare and install the mantle. Since Cheryl’s fireplace was to be built, not existing, Ted was able to request that Cheryl’s mason install a wooden beam to serve as a “nailer” to anchor the mantle to the face of the fireplace.
Ted specified that the mason build a “slot,” in effect, to receive the mantle and to help support it. The slab Cheryl chose was 16/4, or 4 inches thick. Ted asked for a four inch wide wood “nailer” to be built into the stone at the back of the slot. Cheryl had purchased some ready-made corbels to mount under the mantle. The mason also made 2 vertical “slots” under the mantle sized to receive the purchased corbels. The recessed slots were roughly two inches deep and eliminated the necessity to scribe (this term defined later in the article) the entire back of the mantle and the backs of the corbels to fit the face of the stone face.
The mantle is longer than the recess by a few inches. These overhanging ends will be scribed, or fitted, to the stone. These end scribes help give the illusion that the whole mantle was scribed to the stone.
If your project is for an existing fireplace and building a custom “backer” into the masonry is not an option, you can still install a live edge mantle. You will need to find appropriate fasteners to anchor the mantle to the masonry. In addition, the back of the mantle, the edge against the masonry, will need to be scribed to fit snugly to the face of your brick or stone.
Preparing the Slab
 Once the masonry was complete, Ted arrived to prepare the slab. The first order of business was to clean the slab. Originally Cheryl wanted to preserve the bark on the edge of the slab. She and Ted had a long discussion – the bark will eventually fall off in most cases. Whether the bark remains attached during the cutting and drying process is largely dependent on what time of year the tree was originally harvested. Timber cut in the colder winter months is likely to retain its bark, whereas timber cut in warmer months is likely to lose its bark relatively quickly.
If Cheryl had decided to keep the bark, Ted would have suggested carefully removing the bark and then gluing it back in place. Because bark, by its nature has voids and is never quite totally free of dust and dirt, Ted recommends using construction adhesive, rather than a wood glue, to reattach the bark to a slab.
Ultimately, Cheryl decided that she preferred the visual of the ripples formed under the bark of the curly maple to that of the bark itself. Ted moved forward with removing any remaining bark.
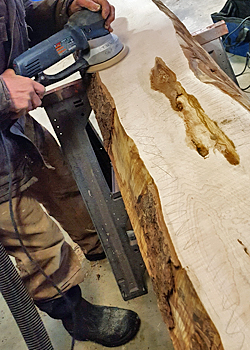
Ted sanded both faces of the slab. On such a rough piece, the usual progression of sanding would be to start at 60 grit, then use 80 grit, and work up to 100 grit. If a finer surface is desired, the process can be continued with higher grit paper. Cheryl liked the result at the100 grit level: she preferred a more rustic look.
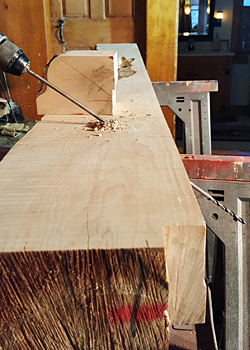
 It can be difficult to see that all the rough saw marks are completely removed from the face of the slab. Although “missed” spots are difficult to see on the unfinished wood, the finish will bring out any imperfections that remain. Ted used a light, held at a low angle, and a pencil to closely inspect and mark the sanded faces. Those spots were then re-sanded to remove the imperfections.
The next step was to clean the edges of the slab to get any dirt or loose debris removed. For this task, a wire brush is the best tool. Move the brush briskly at an angle across the edge of the slab until the surfaces are clean.
Sizing and Scribing the Mantle
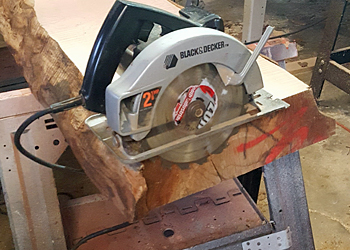
At this point, it was time for Cheryl to choose which face of the slab would be the top of the mantle, and which of the two live edges would face outward to be exposed as the mantle edge. Once she had decided the final width and orientation of the slab, Ted marked the lengthwise rip with a chalk line. Because he was working onsite, he would rip the slab with a skill saw. The thickness of the slab would require that the rip be made in 2 passes, one from each face of the slab. Ted therefore dropped a perpendicular pencil line over both ends of the slab and then, using the ends of the pencil lines, snapped another chalk line for the rip on the second face.
 Once the cut was made, Ted lifted the slab in place so that Cheryl could take a look. When she held up the corbels she had purchased, Cheryl immediately realized that they were too small and did not complement the rustic mantle. Ted suggested that they use the live edge they had ripped from the slab to make custom corbels. While the mantle was in position, Ted and Cheryl made a decision as to its exact length.
 The next order of business was to scribe the few inches of the back of the mantle that extended outside of the “slot.” If you are installing a mantle without a “nailer” and a recessed “slot,” then you will need to scribe the entire back edge of the mantle to the face of your fireplace.
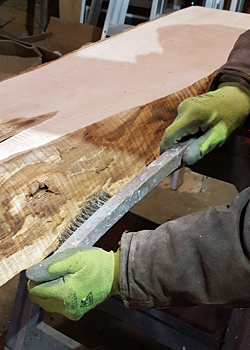
Scribing to stone or brick uses an unusual technique and takes lots of patience. The mantle is held in place and, with a pencil, the contours of the stone are marked on the wood. The mantle is set on sawhorses and the excess material is then removed with a chisel or gouge. Caution: it’s better to take off too little than too much! Hold the mantle to the stone again, but this time tap the mantle with a mallet (taking care to protect the mantle from the mallet strikes) so that the hard stone damages some wood fibers. Return the mantle to the sawhorses and remove the damaged wood. Repeat this process until the entire wood edge touches the stone. Keep in mind that because the stone is irregular, it may be hitting the wood behind your exposed scribe.
 If you are new to scribing, or would like a further illustration, Jim Tolpin wrote a nice article for Fine Homebuilding Magazine that was published in their Oct/Nov 1992 Issue. Basic Scribing Techniques is published online.
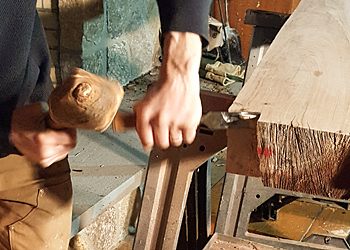
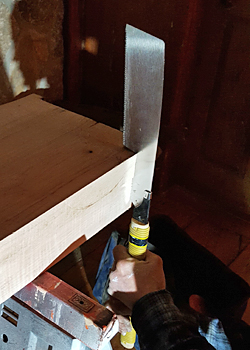
After the scribing was complete, the ends of the mantle were marked with a pencil and cut with a Japanese hand saw. Ted selected this saw for the job because it would make a fast, clean cut through the four inch thickness of the slab. It is important that this cut be clean and smooth, as it will be seen. The cut made by the skill saw, along the back edge of the mantle, is completely hidden from view.
Attaching the Mantle to the Fireplace
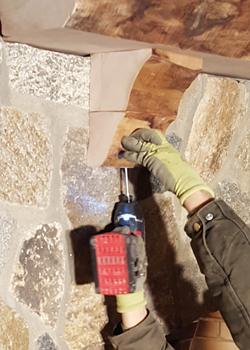
 The mantle is held in place with long (6 inch) heavy construction screws. These have big heads that would be hard to hide on the live edge so Ted decided to place them so the corbels would cover the heads. He held a short piece of 4 inch thick cut off in the slot against the “nailer” to simulate where the mantle would be. He then marked a line on it where the screw would enter the wood below and be hidden by the corbel and where the screw would exit the mantle and grab into the “nailer”. With the mantle bottom side up on the sawhorses, the scrap was set on the surface. With Ted operating the drill with a long bit, and Cheryl’s keen eye watching to be sure the bit was parallel to the line on the scrap, the screw holes ended up in just the right place.
If you wish to apply finish to the mantle prior to installation, this would be the time to do so. Cheryl elected to wait until the entire piece was in place. At this point, Ted applied construction adhesive to the back edge of the mantle, as well as to the embedded nailer, and fitted it into place. Then, using the pre-drilled holes, Ted used the 6 inch screws to securely fasten the mantle to the nailer.
 Installing the Corbels
A single piece of the live edge (four inches) didn’t provide a tall enough corbel, so Ted fashioned each corbel from 2 pieces of the live edge. The new corbels were both wider and longer that the original purchased corbels, so they didn’t fit into the “slot” made by the mason.
Ted scribed the corbels with the same technique as he used in scribing the mantle. Additionally he used an abrasive wheel mounted on a grinder to quickly remove some extra material.
The top piece to each corbel was fitted in place and attached to the mantle with construction adhesive and screws.
The bottom piece was also attached with construction adhesive, and screwed from the bottom into the upper corbel. These 2 screws in the bottoms of the corbels, are the only exposed fasteners, and they are not easily visible.
The Finished Project
It’s clear to see that Cheryl’s mission is complete: the fireplace is an exquisite addition to Cheryl’s home and creates a wonderful gathering place for a cold winter’s night.
-
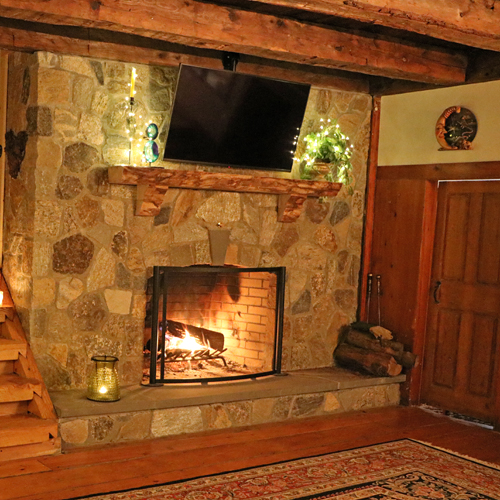
- The rustic live edge mantle perfectly complements the decor of Cheryl’s home.
-
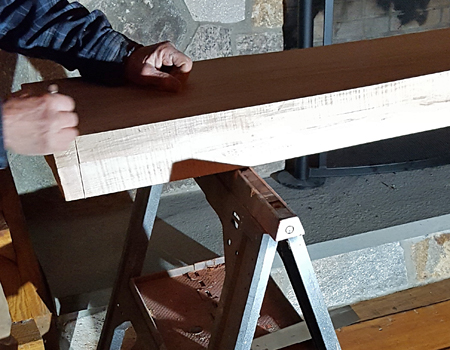
- Marking the mantle length with a pencil prior to cutting with the Japanese saw. The back edge of the mantle, cut with 2 passes with the skill saw, is visible.
-
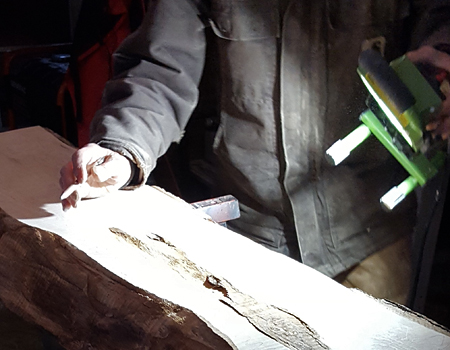
- Using a low angle light and a pencil to mark spots needing re-sanding.
-
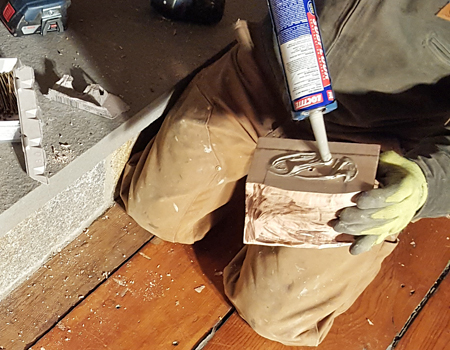
- Applying construction adhesive to the top of a corbel piece prior to screwing it in place.
-
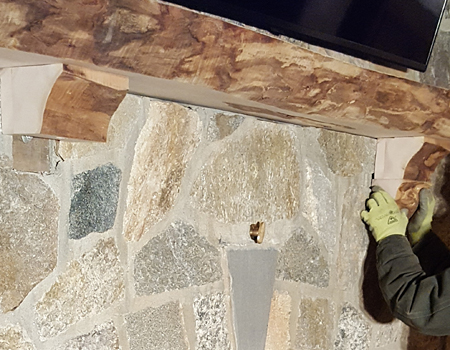
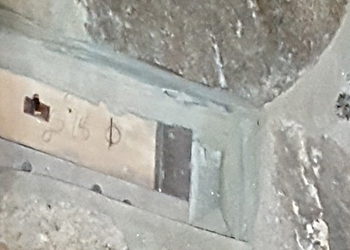
- Fitting the bottom corbel piece. The unused \”nailer\” sized for the discarded corbels is visible under the near corbel.
-
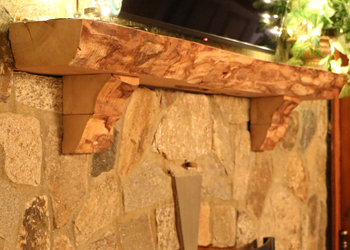
- Live Edge Curly Maple Mantle on a stone fireplace.
-

- The completed live edge mantle and corbels.